Friday, February 28, 2014

Pierogies & Kielbasa


The softness of the pierogies.  The crunch of the onions.  The saltiness of the kielbasa.  How many more textures and tastes must we discuss before you decide that you've read enough and you MUST make this recipe?  This dish is probably one of my favorite meals to make.  Not because of the simplicity but because of the absolute outstanding taste.  

It's a pretty simple meal to make with minimal clean up, too.  You pretty much use two pans.  One to boil the pierogies and the other one does everything else.  I don't know about you but when I hear easy clean up, that's pretty much a selling point for me.

What you'll need:


Add 3 Tbsp. butter/margarine to a saute pan.  Make sure your pan is big enough because this is the pan we'll be cooking the kielbasa and the pierogies in.  Add in your chopped onion and saute them until caramelized and soft.  You can add in a pinch of salt to speed up the cooking time by a little bit.  And it also makes them a little tastier, too!


Remove onions from heat, place in a bowl and set aside.

Boil the pierogies according to the package, subtracting 2 minutes from the cooking time.  You don't want them overly soft.  Drain.  Add another tablespoon of butter into the saute pan that you just cooked the onions in and turn the heat on medium-high.  Add in pierogies, about 5-6 at a time.  Saute on each side until brown. About 3 minutes.  Turn over and repeat.

While the pierogies are cooking, slice your kielbasa.  I like to slice them about 1 1/2 inches thick and cut them at a slight slant.


When all the pierogies are cooked, set aside on a plate.  


Add another tablespoon of butter into your pan and add the sliced kielbasa in a single layer.  Cook for 2-3 minutes on medium heat until the ends start to curl downward and the middle starts to puff up.  Turn and cook another 3 minutes until browned.  You can add the remaining tablespoon of butter when the pan becomes dry and the kielbasa is starting to become darker, quicker.  Just add into the pan a little bit at a time.  Remove from pan and set on a paper towel covered plate to soak up any excess grease.

To serve, place your pierogies on a plate and spoon the sauteed onions over them and serve with kielbasa on the side.  Enjoy!


----------------------------------------------------------------------------------------------------------------------

Pierogies & Kielbasa Full Recipe


Ingredients:

  • 1 bag (or box) of pierogies
  • 1 package polska kielbasa ( you can also use beef, turkey, or other kielbasa that you like)
  • 1 whole red onion, chopped
  • 6 Tbsp. butter/margarine

Directions:

Add 3 Tbsp. butter/margarine to a saute pan.  Add in your chopped onion and saute them until caramelized and soft.  You can add in a pinch of salt to speed up the cooking time by a little bit.
When cooked, remove onions from heat and place in a bowl. Set aside.

Boil the pierogies according to the package, subtracting 2 minutes from the cooking time.  You don't want them overly soft. Drain. Add another tablespoon of butter into the saute pan that you just cooked the onions in and turn the heat on medium-high.  Add in pierogies, about 5-6 at a time.  Saute on each side until brown. About 3 minutes.  Turn over and repeat.

While the pierogies are cooking, slice your kielbasa.  Slice them about 1 1/2 inches thick and cut them at a slight slant.

When the pierogies are done remove from heat and set aside.

Add another tablespoon of butter into that same pan again and add the sliced kielbasa in a single layer.  Cook for 2-3 minutes on medium heat until the ends start to curl downward and the middle starts to puff up.  Turn and cook another 3 minutes until browned.  You can add the remaining tablespoon of butter when the pan becomes dry and the kielbasa is starting to become darker, quicker.  Remove from pan and set on a paper towel covered plate to soak up any excess grease.

To serve, place pierogies on a plate and spoon over the sauteed onions.  Place kielbasa on a plate. You can also serve with sauerkraut or sour cream.

 Enjoy!

Wednesday, February 26, 2014

No Sew Fabric Covered Cork Board


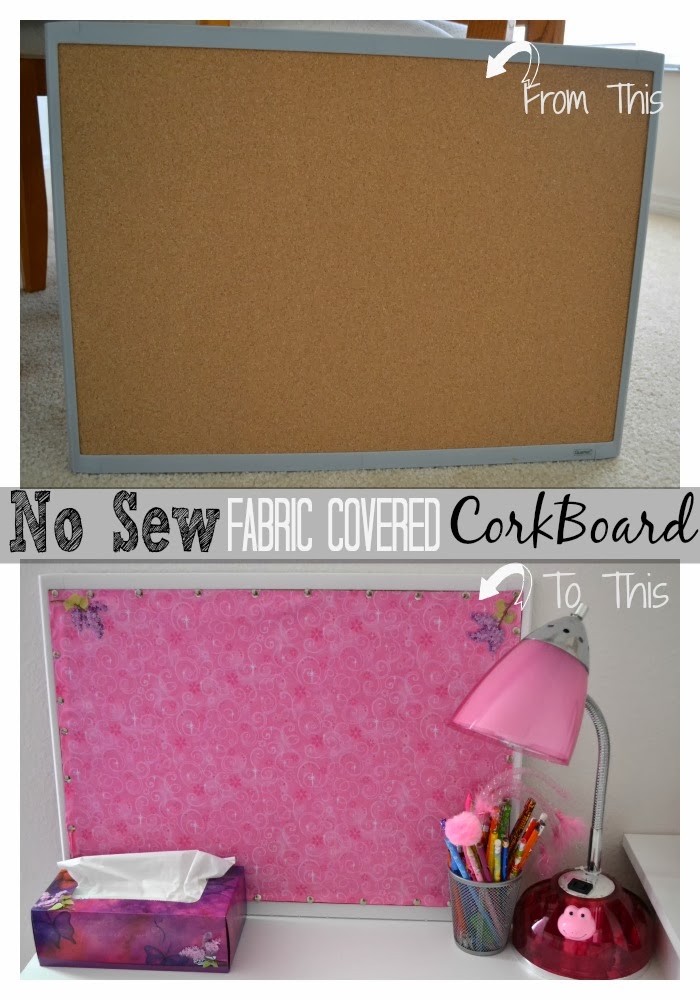
I Came across this idea on Pinterest and thought it would go perfectly in my daughter's room.  I just couldn't deal with the fact that her room would have a giant brown board in an overly pink and purple room. So I decided I'd cover it with fabric.  But I needed something that required NO sewing so this was the perfect way!


 I started with a simple corkboard and spray painted the border white.  You can spray paint the frame any color to match your decor.  


I purchased some fabric that was a bit bigger than the board and already had some tacks on hand.  I cut the fabric to the size of the cork in the middle, leaving about a 1/2 inch on all sides.  


I layed the fabric out flat and started with the straightest edge and pinned it down on the corner and side of the board. 


I continued around the board trying to space the pins as equally as I possibly could, pulling tight as I went around and folding under any excess fabric and pinning that under as well.  To make it a little cuter, I added some 3-D stickers I purchased at Wal-Mart for $1.00 and added them to the side.


Some of the pins aren't spaced evenly, and some are even crooked.  But that's what you get when you do things by hand with no rulers and I swear one of my eyes are higher than the other because everything I do seems to come out crooked.  But for a first attempt I think it came pretty cute and my daughter absolutely loves it.  And that's all that mattered to me  :)


The idea was so easy and cute that I decided to make one for my command center in my kitchen.


And that's it.  An inexpensive way to liven up an otherwise dull bulletin board.  So what are you waiting for?  Go make one!


Monday, February 24, 2014

Valentine's Day Breakfast


I live for the holidays.  All of them.  Big or small.  And I grab every opportunity to the make the best out of them for my kids.  Whether it be festive food, handmade gifts, or going all out.  No detail is too big or too small for me.  I know my kids don't care if they have their names on a place card or if they have handmade gift tags. But I care.  And it's the little things that I can do for my kids that make me happy.

This Valentine's day I decided to make a special breakfast (along with a special lunch, dinner, and dessert) for them.  I knew it had to be simple, quick (because they had school) and covered in hearts!  What's Valentine's Day without hearts?!

The night before, I prepared the main part of the breakfast which was the heart shaped pancakes.  You can see how I made these HERE.  I wrapped them in plastic and stuck them in the refrigerator this way all I had to do in the morning was heat them up in the microwave without having a gigantic mess to clean before getting the kids off to school.


I served these with some strawberries and whipped cream.


 For the drinks I made some strawberry flavored milk and stuffed in a few large marshmallows and topped it with whipped cream and sprinkles.  Super easy and the kids loved it!


So now that we had the menu all set, I decorated the table the night before.  I wanted everything to be pretty much set so this way the kids can wake up to a festive little breakfast.


On the table, I just had a simple printable put into a frame.  ( You can download that HERE if you'd like. )  A place card with their names ( DOWNLOAD HERE ) and I just filled a votive holder with some festive sprinkles, topped it with a tea light candle and you have an inexpensive little Valentine's Day decoration for your table.  Easy peasy, right?


And look who stopped by for a quick visit…..


At each of their place settings I put a new stuffed animal (because they don't have enough of THOSE), a marshmallow pop, the place card, their hershey kiss bags with the owl toppers ( DOWNLOAD HERE ) and their love coupon book that I had made them.  ( You can also download that HERE ).

For my centerpiece, I just used some beautiful tulips my brother had bought me the day before for my birthday.  They were perfect and tied everything together so well.


 Aren't they so pretty?


If you look in the background of these pictures, you'll notice that I have a million hearts all over my walls.  And that's because I did the "heart attack" tradition. Where you tell your kids everything you love about them.   If you'd like to see how that's done, CLICK HERE.

And that's it.  So simple yet it means so much to my kids.  I saw it in their eyes how loved they felt.  And that's worth all the effort in the world to me.

Happy Valentine's Day!


Sunday, February 23, 2014

Junk Drawer Organization


I'm going to assume right now that everyone has a junk drawer.  A small (or large) drawer in your kitchen that collects miscellaneous items throughout the weeks.  Ours was starting to get way too overcrowded with things and I knew I needed this space to be more organized.  So again, I wanted to do it cheaply and easily.  So that's just what I did.


 Before:

Here's what I started with.  Scary, right?


We pretty much had a little bit of everything in here.  Not only the basic stuff like batteries, tape, and scissors.  We also had random things like receipts, broken pieces from headphones, and other crazy stuff I found after emptying the drawer.  It wasn't my proudest moment, that's for sure.

So I needed to start by taking everything out of the drawer.  I needed to put things back where they belonged.  Most of the stuff was put back into my craft boxes, medicine was put back into the bathroom,  and everything else relocated back to their original spots.  

I wiped the drawer down (I was surprised how many pencil shavings my kids actually didn't catch in the pencil sharpener). I lined the drawer with some non-slip shelf liner. 


I put some inexpensive dividers in the drawer which I purchased at Wal-Mart.  They're about $1.25 for a 2-3 pack depending on the size.  


I divided up the containers.  Batteries on the bottom left corner, the stuff I need to pay my bills on the right lower corner, pens and a notepad in the middle, and screwdrivers and lighters in the top left corner.  The middle top container holds tape, scissors, white out, and all those misc. stationary items, and the top right container holds our health items like vitamins, mints, extra medicine droppers and gum.


I labeled each container this way the kids know where everything is (and more importantly where everything goes when they're done using it).  

After:

And there you have it.  A nicely organized junk drawer for very little money out of your wallet.  What can be better?


Saturday, February 22, 2014

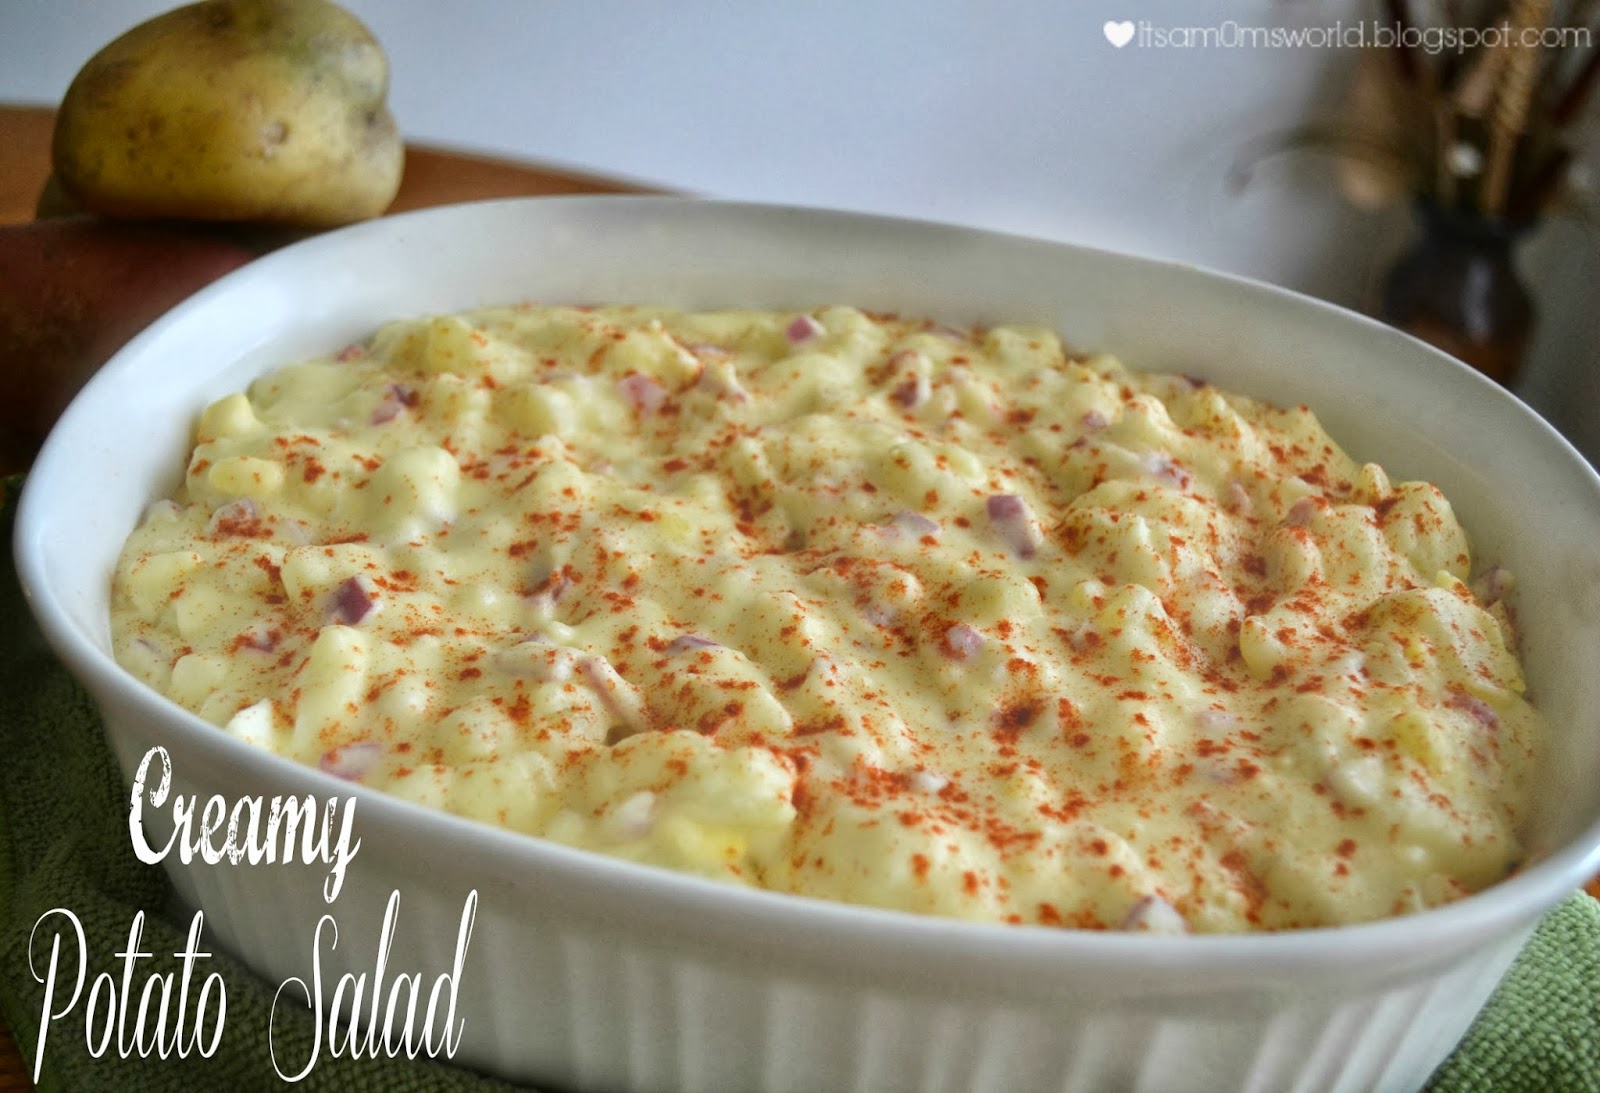
Creamy Potato Salad


Ingredients:

  • 5 lb. bag potatoes of your choice ( here I used yellow )
  • 1 red onion, chopped
  • 6 hard boiled eggs, chopped (yoke and white)
  • 2 cups mayonnaise
  • 1 1/4 cup confectioners sugar
  • 1/2 cup apple cider vinegar
  • 1 Tbsp. + 2 tsp. of salt
  • Paprika for garnish (optional)

Directions:

Start by rinsing off your potatoes.  Peel and dice into squares.  Place chopped potatoes into a large pot and cover with water.  Add 2 tsp. of salt into the water and turn heat on high to bring to a boil.  Once the water is boiling, turn down to medium high heat and boil until fork tender, about 20 minutes.  Do not overcook or your potato salad will be mushy.

Drain potatoes and place into a large bowl.  Add remaining ingredients and stir gently until all of the ingredients are well incorporated.  

Sprinkle with paprika.  Cover and store in the refrigerator until ready to serve.

Enjoy!


Thursday, February 20, 2014

Valentine's Day Sandwich


If you're looking for something easy, cute, and fun to put into your child's lunchbox then this sandwich is perfect!

Step 1: Add your "filling" of choice to the bottom piece of bread.  You can use anything your child likes but the stickier the better.  Here I used peanut butter.  Cutting the crust off is optional.  I just think it looks a little neater this way.


Step 2:  Take your top piece of bread and cut out a heart shape using a cookie cutter.


Step 3:  Place both pieces of bread together to assemble your sandwich


Step 4:  Add sprinkles until the heart is covered. 


..And that's it!  This sandwich is sure to make your little one smile!


Who wouldn't LOVE to open their lunch box at school to see this cute little sandwich?  It's the little things in life that mean the most. 


Wednesday, February 19, 2014

Valentine's Day Heart Attack Tradition


I had seen this idea on Pinterest and I immediately fell in love with it.  The idea is to write what you love about someone on a heart and place them around your home.  Well I knew I had to do this for Valentine's day so I got to work.

A week ahead of time, there I sat on my bed folding construction paper in half and cutting out different sized hearts.  There was no fancy cutter, printables, or anything of the sort.  Just good ol' paper, a sharpie marker, and scissors.   I sat there and thought about what I loved so much about each one of my kids.  Before I knew it, the pile of hearts had grown gigantic.  On every single heart I wrote "{child's name}, I love you because….and then listed a reason.  I even threw in some ones that were signed "From, Dad" to let them know that I wasn't the only one that found them to be amazing kiddos!  The pile grew even larger, as well as my smiles.

The night before Valentine's Day I was setting up my dining room for breakfast the next day.  I decided to tape them all over the walls.  Little did I know that there was just too many to fit.  So I started thinking about where they go each morning and I started to disperse them around my house.  I posted them in the bathroom, in the hallways, on the front door, and I even left one on each of their car seats so when they got into the car for school, the fun wasn't over quite yet.

I loved the idea so much that I had to "heart attack" the hubby's truck.  I'll spare you the picture of THAT horrendous mess. ( He really needs me to get in there and place some baskets around and organize ).


Each of my hearts were different.  Some misshapen, some round, some pointy…and some that didn't even really resemble a heart.  But my kids didn't care about that.  They admired the words on them.  They smiled when I read them.  Their little faces glowed as I named reasons of why they were so fantastic to me.  And not only did that little pile of hearts grow and grow with so many reasons, but my heart grew as well.  It's pure love.  I know that's what they felt.  And I will cut out little paper hearts till my fingers fall off just so maybe they could see how perfect and wonderful they are when seen through my eyes.

Tuesday, February 18, 2014

Easy & Cheap Label Laminating Without a Machine


If you've read previous posts of mine, you know I completely heart baskets, buckets, and oodles of other containers that store random things around my home.  But in order to keep things organized and simple for the kids to know where things go, you have to label.  It just keeps things in order and you always know where to find things, too!  When I first started to organize things in my house, I started making my own labels.  I would make them, print them on regular paper, and glue/tape/or tie them on my containers.  Within a few days I would find crumbled up pieces of paper all over my house.  I'd pick them up and throw them away thinking it was just a scrap piece of paper from the kids coloring books or maybe my husband lost another receipt out of his wallet.  But then I started noticing something. Where…WHERE are all my labels?!  They were gone.  Vanished.  Couldn't find them anywhere.  And then it dawned on me.  I, myself,  got rid of them without even knowing all the hard work I was throwing away.  Pun intended.

I tried to pin point why my labels weren't staying on.  Then I realized.  They were too flimsy and they weren't strong enough to withhold the death grips of my toddlers.  They were being wrinkled and crumpled up within days.  So I knew I needed to start laminating them to make them last longer and be more sturdy and strong.  But I didn't have a laminating machine.  And I wanted it done quick.  So here's this little gem piece of information for you.  You don't need a laminating machine.  All you need is some scissors and shipping/packing tape.  BOOM!  That was the sound of your mind being blown.

So, lets see how this is done, shall we? This might turn into the shortest post in blogging history.  It takes literally three steps to do this.

Supplies You'll Need:

  • Packing/Shipping Tape
  • Scissors
  • Your labels

 Step 1: -Unroll a piece of tape and place your label face down onto the sticky side.  Cut the piece of tape leaving a slight border around the label.


Step 2:
 Cut another piece of tape the same size and place the sticky side on the back of the label. Both sticky sides should be touching one another.


Step 3:
Cut around your label to have clean edges and you're finished!

You're left with perfectly laminated labels without having to buy a machine.  And it's super cheap.  The tape costs around $4 for two rolls.


I used this "system" to laminate my labels inside my pantry. 
Don't they just look so pretty?  Well, you can't really see that something is laminated in a picture but just take my word for it.  It's pretty!


Now go ahead and go nuts with this.  I know I did.  I turned myself into an awesome, lean, mean laminating machine!  Really?..what's with all the puns today?….