Wednesday, May 21, 2014

DIY Yarn Wrapped "LOVE" Bottles


 I came across this type of idea a long time ago on Pinterest where someone had wrapped bottles with twine.  I absolutely loved the look and simplicity of it but being I have a different color scheme in my bedroom, I knew the bottles just wouldn't go.  So I decided to wrap them with white and grey yarn and I was so happy with the way they turned out.


Supplies you'll need:
  •  4 bottles - any shape or size will work.  I used 4 empty (and washed out) glass soda bottles


You'll also need:
  • colored yarn (I used grey and white)
  • hot glue gun
  • double sided tape
  • embellishments (I used buttons and flowers that I purchased at Michael's)

 First, I added 4 long pieces of double sided tape to each side of the bottle.  This will prevent the yarn from moving around as you're wrapping the bottle.


 I added a dab of hot glue on the bottom of the bottle and stuck my piece of yarn to it, holding it for a few seconds to have it stay in place. (Obviously this was the second bottle I did because it's a different color) :)


Then I started to wrap the bottle, getting as close as I could to the previous line of yarn so there wouldn't be any spaces.  I continued all the way around the bottle.


{ If you find that you get to the smaller part of the bottle and your yarn seems to be spacing a bit, just add some hot glue underneath to hold it in place and continue wrapping. }

When I got to the very top I just wrapped as much as I could and then finished off with a dab of hot glue and I was finished!


I hot glued each embellishment on to make the letters on each bottle except for the "E", which as you can see was made from yarn.

I purchased these beautiful white sprigs in Michael's and thought they would go perfect with the grey and white color scheme I picked.


I'm so happy with the way they turned out and it didn't cost very much to complete this project.  


This was a DIY project I definitely fell in LOVE with!


Tuesday, May 20, 2014

Creamy Macaroni & Cheese

I think it's safe to say that everyone growing up remembers eating macaroni and cheese.  It's one of the comfort foods that I can't live without.  I don't know if it's because of my insane need to fill up on delicious cheesy carbs or what, but whatever the reason, I absolutely love it.  And this recipe is not only warm and creamy but doesn't take a lot of time to prepare.


Ingredients:


  • 2 cups uncooked elbow macaroni
  • 2 cups milk
  • 1/4 cup all-purpose flour
  • 1/4 cup butter or margarine
  • 1 tsp. salt
  • 2 cups shredded cheddar cheese

Directions:

Preheat oven to 350 degrees.

Cook macaroni according to package.  While pasta is cooking, melt butter in large saucepan over medium-low heat.

When butter is melted, stir in flour.  It might become a bit crumbly, like a paste.  Quickly stir in milk and whisk until everything is dissolved and smooth. Bring to a boil while constantly stirring and then remove from heat. Immediately add cheese and stir until cheese is melted and smooth.


Drain pasta and add into the cheese sauce.  Stir until combined.

Pour into ungreased 2-qt casserole dish and bake at 350 for 20-25 minutes until bubbly.

Enjoy!


Saturday, May 17, 2014

How To Line Your Drawers Using Wrapping Paper

I recently picked up a desk for $5.  Yeah, don't go back and read that sentence.  You read it right the first time.  Five bucks!  I was so ecstatic to start this new project and give this ugly desk a new makeover for my daughter's room. I finally finished it ( that will be a future post ), but there was one thing that was really bothering me.  The inside of the drawers.  They were so disgusting and no matter how much I cleaned it, they still remained gross!  They had marks, scratches, and who knows what that weird goo was that was inside the drawers.  All I knew was that it was making me a little ill to think my daughter's stuff would be sitting on top of all this mess.  I know, I know…you're probably thinking "um, why didn't you just paint them?" and the answer is simple, I was lazy.  I had just finished painting a night stand, a desk, and an entire dresser.  I was pretty much exhausted at the idea of painting anything else, waiting for everything to dry, and having to wash out those darn brushes and rollers again.  So I took the easy way out.  I know, I'm so lazy! So I knew I wanted to line the drawers.  So, I went to my BFF Pinterest to look for a few ideas.  What I mostly came across was how I could line my drawers with wall paper! "PERFECT", so I thought.  So I started the search for wallpaper.  And came across the giant price tag attached to it. "NOT PERFECT!" I wanted to do this, but not spend a ton of money, considering I paid almost nothing for the desk.  The idea of doing a really great project, to me at least, is that you get to make something your own, while saving a boat load of money.  So I knew I needed something cheap, and that's when the wrapping paper idea came into play.  I liked the idea, loved that they had so many patterns and colors to choose from, and loved the price of it.


Here's the drawers before:


 I know. Barf-tastic right? (is that even a word?) Well, if it's not then I just made it up just for the sole purpose of trying to explain these drawers.  And honestly, this wasn't even the worse one.
I started out by taking a bowl of hot soapy water mixed with white vinegar and a clean rag and using plenty of elbow grease, and started wiping all of the drawers down.  Most of the "yucky-ness" came off, but they still looked pretty dingy to me.

I found two rolls of wrapping paper in the dollar store (SCORE!) that I thought were pretty and went well with her light colored desk.  It's a soft silver and white striped paper that I thought was really pretty and looked really clean and bright.

I started out by unrolling the wrapping paper and marking it to the size of the bottom of the drawer.


Well this was a bit wrinkly and not very pretty looking at all but I was trying to do this one handed to take this picture.  Work with me here! :)

Then I cut the paper to size, making sure the piece went all the way to the sides.

Then using my hot glue gun, I put some glue in the middle, and a dab of glue in each corner.


 I pressed it down, making sure all the corners were stuck and nothing was lifting.  Then I started on the sides.

I took the roll or wrapping paper and marking each piece, I cut a piece to fit each side, having a little extra to cover the top edges as well.


 Lining up the pattern as best as I could, I put a small line of hot glue on the bottom edge and then a line of glue on the top edge and glued the paper to the sides.


Whatever over hang was left, I just trimmed off.

I repeated this step on both sides and the back of the drawer, but I didn't do the front of the drawer because I actually had painted that white.  

Here it is all finished and so beeeeee-autiful.


And there you have it.  Cute lined drawers for $2.  The paper hasn't ripped or has shown any wear at all.  It actually holds up really well!  And the beauty part of it is, is that when it does become a little worn, or I find another pattern that I think would look a little cuter, I can just simply rip this off and start again.  

And that's a wrap!


Monday, May 12, 2014

Super Simple Baked Ziti

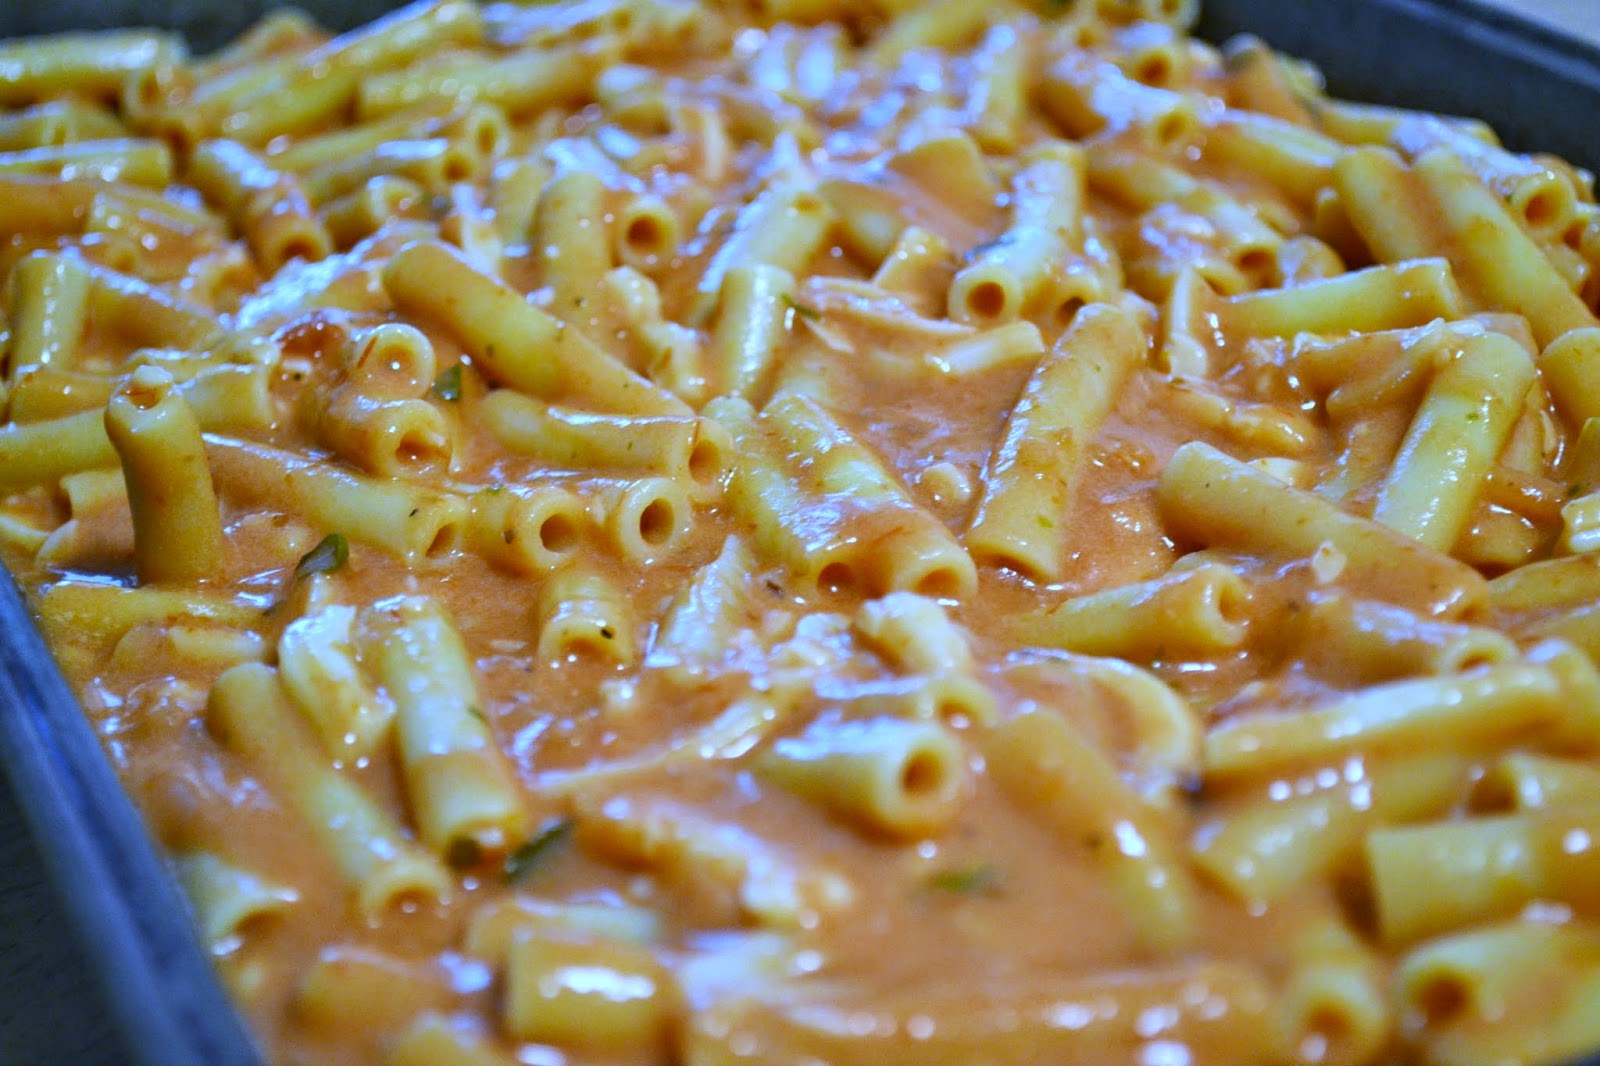
This baked ziti is so delicious and takes minutes to throw together.  I like the fact that baked ziti is something that can be prepared in the morning and popped into the oven right before dinner.  It makes dinner time go so much smoother.  While this isn't my family's original baked ziti recipe, this is a REALLY delicious dish.  When you can't decide between having pasta with alfredo sauce or pasta with marinara, have both!  That's what makes this baked ziti so awesome.  It's the best of both worlds. So I thought I'd share the recipe with you.  Pair it with some garlic bread and a salad and you have a delicious, easy, and cheap meal in little to no time at all :)


Ingredients:


  • 1 box (16 oz) ziti
  • 1 ( 15 oz) jar alfredo sauce
  • 1 (24 oz) jar marinara sauce
  • 2 cups shredded mozzarella
  • 1 cup shredded parmesan cheese
  • 1 Tbsp. parsley *(OPTIONAL)*
  • 1 Tbsp. red pepper flakes *(OPTIONAL)*


Directions:


Preheat oven to 350 degrees.

Cook pasta according to directions on the package.  Drain.

In a large bowl, add marinara and alfredo sauces and mix together.  Add mozzarella cheese and stir.

Then add the pasta and toss to coat.

Pour into a 13x9 baking dish and bake for 20 minutes.  Remove from oven and top with shredded parmesan cheese.  Bake an additional 5 minutes until cheese is melted and bubbly.  Sprinkle with parsley and red pepper flakes (if you're using them).


Enjoy!


Friday, May 9, 2014

Bedroom Furniture Makeover Part 2

If you saw my post about how I stained my nightstands black, I said that I would be bringing you an update on my dresser.  I pretty much duplicated the exact way I did my nightstands except the only difference was that I had a broken corner I had to fix.  Here's how the total project turned out:


I was super happy with the way it turned out.  So lets get right into the makeover shall we?

Here's the dresser before in all it's ugly glory:


This was horrendous, not going to lie.  Again, it had tape on it where I had taped the drawers closed when we moved into our house.  It had scratches, knicks, and broken corners all over the place.  I don't know how I lived with this for as long as I did.  I guess it's because every time I wanted to do a new project or fix up a room in my house this was the last place that was shown any love.  Obviously!

If you want to see step by step how to stain your furniture black, click HERE.  This post is going to stay pretty basic and I didn't really take step by step pictures because it was basically the same steps as my previous furniture re-do.

But I started out removing all the drawers and sanding everything down.


I used my hand sander for the large surfaces, and had to sand by hand all the narrow parts and details on the dresser.  It took me about an hour or so.  I didn't have to sand down to the bare wood.  Just sand it enough to take the finish off and have something for the stain to stick to.

I sanded all the drawers down and had to fix that broken corner.  Luckily, I found the chunk that had broken off in one of my other drawers so all I had to do was apply some wood glue, stick it on, and fill in the cracks with wood filler.  I clamped it down and let it all set and dry overnight.


When it was dry, I sanded it all down so it was smooth to the touch.  Remember the rule:  If you can feel it, you'll see it when you paint or stain.  So I made sure it was as smooth as I could get it.

I filled in all holes where the hardware was previously, because I knew I would be moving the hardware around.  21 knobs on one dresser?!  That's just absurd!  So I knew I would be cutting that by at least half!


I applied the stain with foam brushes, letting it dry overnight between coats.

I dipped the hardware, had hubby drill the new holes, and I was finished!


I think I've found my new hobby with re-doing furniture and DIY projects.  Maybe it would fall under the category of slightly obsessed? What do you think?

Keep checking back for my future post which I'll be showing you how I made my headboard.  Well, I guess that answers my above question!


Tuesday, May 6, 2014

Grocery Shopping Printable To Keep The Little Ones Busy

The dreaded task that we all have to do.  Grocery shopping.  Just the words are like nails on a chalkboard to me.  I don't mind when I only have to get a few things.  But when I have a list as long as the River Nile now it's a problem.  So I made this simple list for my kids.  It's pretty much things we buy on a regular basis.  Whatever I don't need to buy that week that is on the list, I just check it off before we go and they know that's something we don't need this time.  If you'd like to download the free printable, click HERE


The list is easy enough to read for the older kids, yet simple enough for my littlest one to just look at the pictures.  They had such a good time finding all the things they needed on their list and it kept them busy enough where I didn't have to repeat "get in back of me when I walk, please" or "hey, get over here and let that lady pass".

Just print it out, stick it in a laminate sleeve, give your kiddos a dry erase maker and let them check off what they found.  Plus, putting it in a laminate sleeve lets you use it over and over again without printing new paper every time you need to go shopping.  Just wipe it clean.  I keep them in my car and they'll be ready for the next time we go grocery shopping.

It's a simple thing that makes things a little more enjoyable when whatever I'm doing isn't exactly an exciting process.  Yes, grocery shopping is boring,  Yes, it's annoying.  And yes, it isn't something I enjoy that much but when I can get my kids involved in the little things and make something a little more fun, we all have a better time.  Plus, this little list could have kept my kids out of YOUR way.  You're welcome :)


Sunday, May 4, 2014

Yummy Blueberry Muffins With A Sugar Crumb Topping


Muffins.  The perfect quick breakfast on the go.  But what's a muffin without blueberries?  It's like having a pizza with no cheese.  A burger without the bun (sorry Atkin's lovers).  A PB&J sandwich without the peanut butter.  A….okay I think you get the point.

If you're looking for a delicious, fluffy, sweet, low calorie blueberry muffin….well, you've come to the wrong place, my dear!  While it is all those things, it is far from low calorie.  This little muffin packs away some sugar, not going to lie.  But when you taste it, it's completely worth it.  Each muffin isn't going to put you over your sugar intake for the day, as long as you only eat one.  But I have found from experience, that can't happen.

This recipe makes 12-14 muffins.  I usually make 12 large ones and discard a little extra batter at the end because frankly, who the heck wants to wait around for 20 minutes while two muffins bake in the oven?  I for one have better things to do with my time.  (that's a lie).


Ingredients:

  • 1 3/4 cup flour
  • 1/4 tsp. baking soda
  • 2 tsp. baking power
  • 1/2 tsp. salt
  • 1 cup sugar
  • 1/2 cup buttermilk ( you can make a substitute if you don't have it.  Add 1 Tbsp. white vinegar to a measuring cup, then add milk to make 1 cup.  Let sit for 5 minutes)
  • 7 Tbsp. oil
  • 2 1/2 Tbsp. sour cream
  • 1/4 tsp. vanilla extract
  • 1 1/2 cup fresh blueberries (can use frozen)
Sugar Topping:
  • 1/3 cup flour
  • 3 Tbsp. sugar
  • 1 Tbsp. brown sugar
  • 3 Tbsp. cold butter, diced
  • 1/2 tsp. water

Directions:

Preheat oven to 400 degrees.  

Prepare your crumb topping by placing flour, sugar, brown sugar, cold butter, and water in a food processor and pulse until all ingredients are mixed well.  It should only take a few seconds.  Don't over mix because the mixture can become dense.  The mixture should be fluffy with a few big "chunks".  Set aside.

In a large bowl, mix together flour, baking soda, baking powder, salt, and sugar.  Set aside.

In a separate bowl whisk together buttermilk, oil, sour cream, and vanilla.  Add liquid mixture into the dry flour mixture and whisk together carefully.  The batter should be lumpy.  Do not over mix.  Fold in blueberries with a spatula.

Line a muffin tin with liners.  Divide batter equally to make 12-14 muffins.  Each muffin cup should be filled 3/4 of the way.  (If you're making 12 muffins, discard the remaining batter.)  Let sit for 10 minutes.

After the muffins have "rested", fluff up crumb mixture and sprinkle each muffin cup with the topping until each muffin is covered.  

Bake muffins in a 400 degree oven for 20-25 minutes until a tooth pick inserted in the center comes out clean.  Cool several minutes in the pan before transferring to a wire rack to cool.

Enjoy!