Monday, June 30, 2014

How To Paint Thrift Store/Garage Sale Finds { From Drab To Fab }

When I discovered that I could paint thrift store finds I was ecstatic.  Like, 'put-on-some-tap-shoes-and-do-a-little-dance' type of excited.  If I would have known this sooner, I wouldn't have passed up so many good finds that just weren't the right color.  Or even some that were so cute but had horrific colors, patterns, or had some scratches or damage.  But the best part about doing a "thrift store makeover" is that you only need one type of paint and it takes only a few minutes.  Just makes ya wanna sing, doesn't it?? Go ahead, I won't tell.


For this project you'll need:


  • Thrift store and/or garage sale finds ( I'm a "state the obvious" type of person )
  • Rust-Oleum Universal Spray Paint in the color Gloss White (can use any color, actually)
I started by wiping down all my vases with a mix of vinegar and water.  Make sure your finds are all free of dirt and dust.

Here's what the paint looks like:

These were the vases I had purchased at my local thrift store.  The tall bud vase I actually got for .49.  Seriously?  I could look under the seats of my car and buy a million!


I just gave everything two thin coats of paint, letting the coats dry for a few hours in between.  I sprayed them about 3-4 inches away so there wouldn't be any runs. I sprayed one thin coat on the inside too.  Easy peasy!


And that's it!  Takes no time at all and gives new life to otherwise boring old decor.

I even painted this little owl that was .99 at a garage sale.  


Poor little guy was sitting there all alone.  No one wanted him because he was quite the ugly duckling!  But with a fresh coat of paint, he's one of my favorite little decor pieces!  See?  Our mothers were right! Never judge a book by it's cover. Here he is with his new makeover:


Dapper, isn't he?

I'll always be on the lookout for things that I could change up and make new with a few coats of paint and a whole lot of imagination.


Sunday, June 29, 2014

Dining Room Hutch Makeover Reveal


When I got the call from my mother asking me if I wanted her old dining room set I immediately jumped on it.  I've been looking for a dining room hutch for a long time and couldn't find anything that I liked. They were either too big, too small, or just not the right look for me.  I loved the design of this hutch, the detail, and because it was a lighted one as well, made it all the more appealing to me.  The only thing that bothered me was it seemed a little outdated for what I was looking for.  Dark wood (and laminate), gold handles, and a table to match.  It immediately darkened up my dining room and lately I've been on a kick to brighten EVERYTHING in my house and add in color. So I knew this project would have to come sooner than later so I was determined to get it done.

This isn't going to be a full detail tutorial like my usual furniture reveals are.  And actually, there really wasn't much to this hutch.  I didn't even sand it! I've been working on a few projects for weeks now and the thought of starting up my sander again made a little nauseous. ( okay, slight over-reaction) but you get what I'm saying!

So, as any furniture reveal starts, here's the before:


It's not bad.  The condition is perfect.  There wasn't any damage, scratches, or holes.  It was just too dark for me. So I took off all the hardware, detached the top part of the hutch from the bottom, and I took it out to the garage.  ( And when I say "I", I totally mean my husband).

I was a little nervous redoing this hutch because while the bottom cabinets are real wood (which I've obviously worked with before) the top sides and back of the hutch is laminate.  I didn't know how it was going to work out with me not sanding it.  But I figured I'd give it a whirl and see how it turned out.


After removing all of the glass and cabinet doors, it was ready to be primed.  Because I wasn't going to be doing any sanding, I used Zinnser Cover Stain Primer.  If you're going to skip sanding, it's recommended that you use an oil based primer.  And that's the one I had on hand, so it was perfect.


I did two coats of primer on the bottom and top half of the hutch, letting each coat dry for 2 hours.

Now, if you follow my blog or have read previous furniture re-do posts, you know my absolute favorite  go to white paint is Popped Corn by Behr.  I LOVE it.  The first coat of paint I applied with a sprayer because the hutch was just so huge looking to me! I was completely overwhelmed when I actually saw all of the detail it had on it.


I picked up this little sprayer from Harbor Freight for a measly $16.99.  God bless the people who decided to put it on sale!  And on top of the great price, it's purple? Um, yes please!

The next two coats were applied with a 6" foam roller brush.

I wanted the back of the hutch to have a really pretty pop of color against my all white decor.  So I chose the color Cool Jazz by Behr.  It's a Tiffany blue type of color, with sort of a beachy vibe to it.  It's a gorgeous color and looks so clean and fresh with the bright white paint.  So I gave the inside of the hutch two coats of paint, letting the first coat dry overnight.

I sprayed all of the hardware with a thin coat of spray primer I had on hand and when they were dry I gave them all two thin coats of Rust-Oleum silver metallic spray paint.


After putting the hutch all back together, it was done.  It took me a total of 12 hours to complete it.  Not too shabby, right?  Keep in mind, that includes all drying time.  I was just glad it was over and ready to be put back in it's original spot, looking more beautiful and fresh with it's makeover!


Here's the complete before and after:


I couldn't wait to see how my white decor would look against the bluish/green background, and was so excited to see the way it turned out.


( In a future post I'll show you how I transformed that little owl into the handsome little guy he is today.  He was certainly an ugly ducking! )

And there ya have it!  My dining room hutch reveal.

Now it's onto redoing my dining room table and chairs! That will be coming soon, so keep a lookout for that!


You May Also Like:

Wednesday, June 25, 2014

Crockpot Chicken & Dumplings


This chicken and dumplings recipe is so delicious and the best part is, it's all done in the crockpot.  I've been looking for a good recipe, but when I searched on Pinterest they were all made with "cream of chemical" soups.  So I just threw in a bunch of stuff, turned it on, and crossed my fingers.  The outcome was a warm, creamy, and delicious soup that is guaranteed to become a family favorite :)


Ingredients:


For Soup:

  • 1 package chicken breasts
  • 4 Tbsp. margarine/butter
  • 2 boxes ( 32 oz) chicken broth
  • 2 carrots, peeled and diced
  • 1 bag frozen corn
  • 3 stalks of celery, chopped
  • 1/2 sweet onion, chopped
  • 1/2 tsp. garlic powder
  • 1/4 tsp. onion powder
  • 1 Tbsp. dried parsley


For Dumplings:

  • 2 cups flour
  • 1 cup milk
  • 1 tsp. salt
  • 1 Tbsp. baking powder


Directions:

Add in chicken breasts to the bottom of your crockpot.  Add in all soup ingredients and cook on LOW for 7 hours.  When the chicken is cooked, remove from crockpot and shred or break apart with two forks.  Add back into broth.

For the dumplings, combine all ingredients and mix well.  Drop dough by round tablespoons into the soup.  Cover.  Cook 1 hour on high.

Serve warm.

Enjoy!

Note:  For a thinner soup, add in some more chicken broth.  
For a thicker consistency, you can add in 1-2 Tbsp. of cornstarch.  


 You May Also Like:


Sunday, June 22, 2014

DIY Centerpiece/Decor Using Styrofoam Balls & Cheap Craft Supplies

This DIY project is so simple to make and can really be made from things most people already have around their home.  I did have to purchase the styrofoam balls ( got them at Wal-Mart for around $5. ) But everything else I already had on hand.


Supplies I Used:


  • 1 Package large styrofoam balls
  • 1 Package small styrofoam balls
  • Fabric
  • Tacks
  • Yarn and/or Twine
  • Hot glue gun
To wrap styrofoam with fabric:
I started by cutting scrap pieces of fabric I had left over from a previous project.  I cut them into strips. No certain length or width.  


I placed a dot of hot glue onto the styrofoam and wrapped each piece around, putting hot glue onto the end, and overlapping each piece.


To wrap styrofoam with yarn:
I placed a dab of hot glue on the ball in the middle.  I started to wrap the ball, going upwards, placing hot glue every few strands so it would be tightly woven together.  


When i finished at the top, I placed another dab of hot glue.  Then starting underneath where I first began, I started wrapping again until I finished at the other end of the styrofoam.  


I also wrapped them with yarn overlapping, just as I did with the fabric.  


To apply tacks:
Simply push in tacks, overlapping slightly. 


You can see me in the tacks. Oh, hey there! :)

And that's it! Just place them in a vase, on a decorative plate, or in a glass bowl and you have a cute centerpiece that is simple to make and very inexpensive.


Tuesday, June 17, 2014

Boy's Room Free Printable

I've been working on updating my kid's rooms and have been working on a few printables and so I thought I'd share a few with you over the next few weeks!  This is for an 8x10 frame.  It's simple with a touch of nautical.  I thought it would go perfect in my son's room because of his red, white, and blue theme.  Happy printing!

CLICK HERE to download the printable.


Thursday, June 12, 2014

Kitchen Hutch Makeover Reveal

I've officially become obsessed with making something out of nothing.  I was so excited to start this project.  The hutch before was a complete disaster.  But the reason I chose this piece was because it was FREE from a neighbor.  Yes, you read that right.  F-R-E-E!  Big fat goose egg.  No moola.  Okay, I think you get the point.  I don't even know what this piece was originally used for, and I didn't care.  I knew where I wanted it in my home, and I was going to make sure it looked perfect for my kitchen.

{Warning:  This post is extremely pic heavy so you'll either (A.) really enjoy it, or (B.) completely be annoyed by it. Hopefully we go with A. }

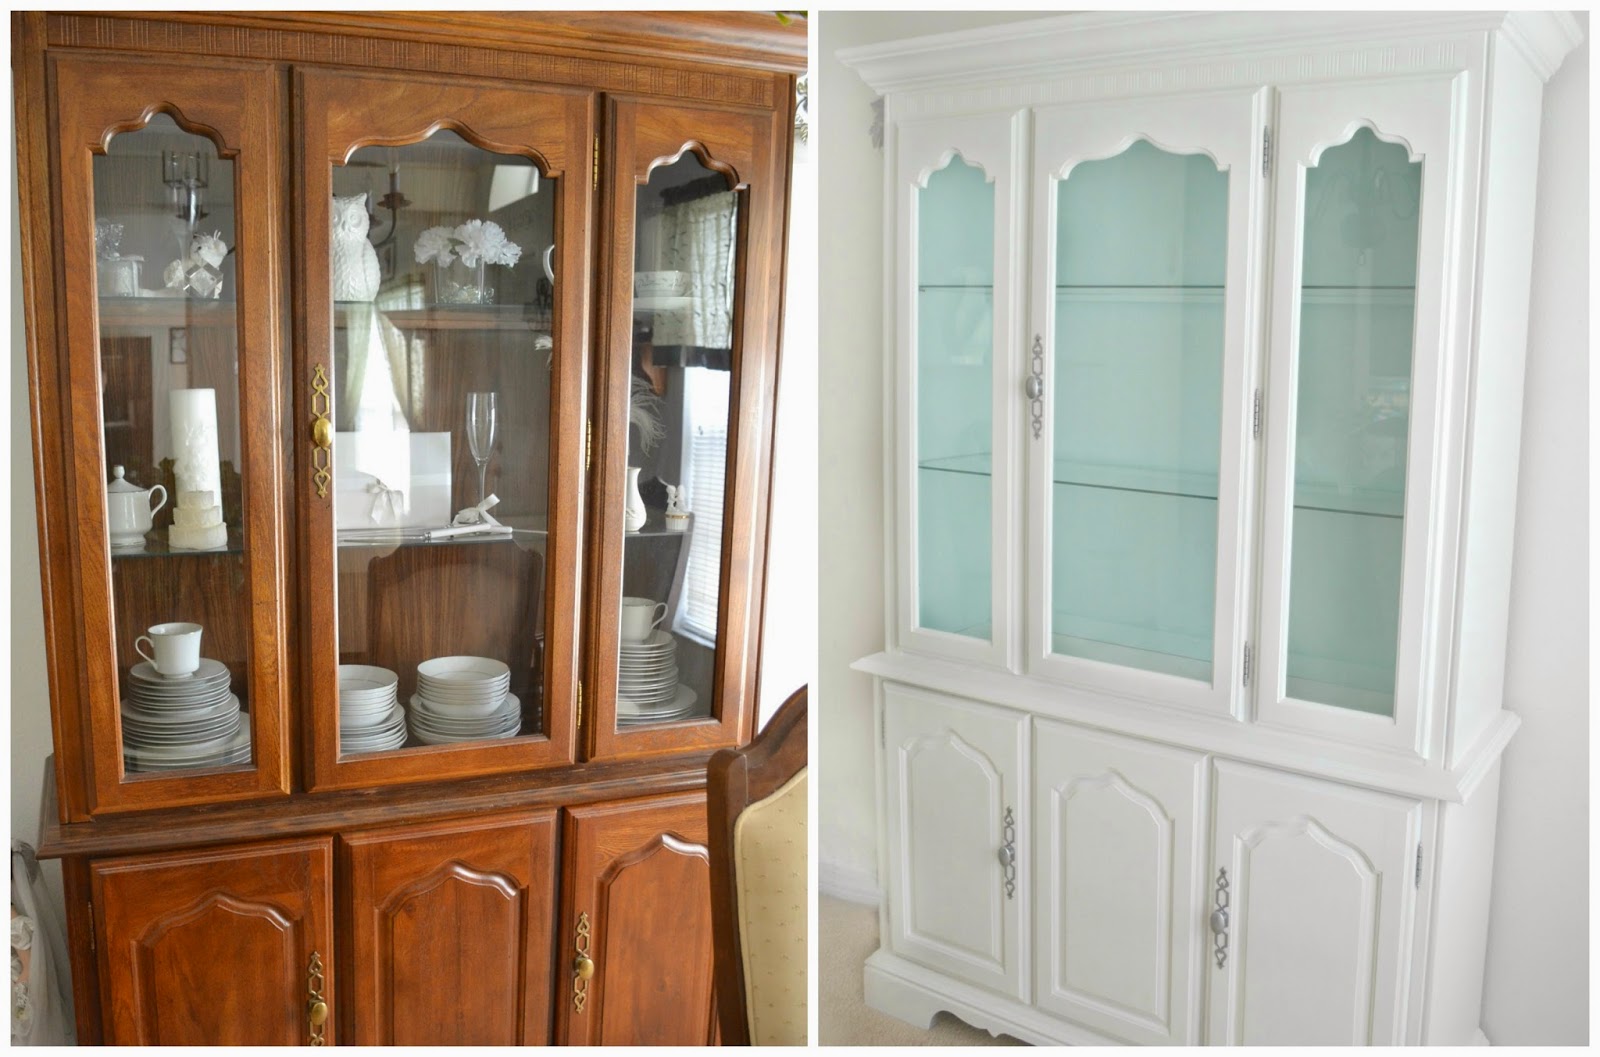
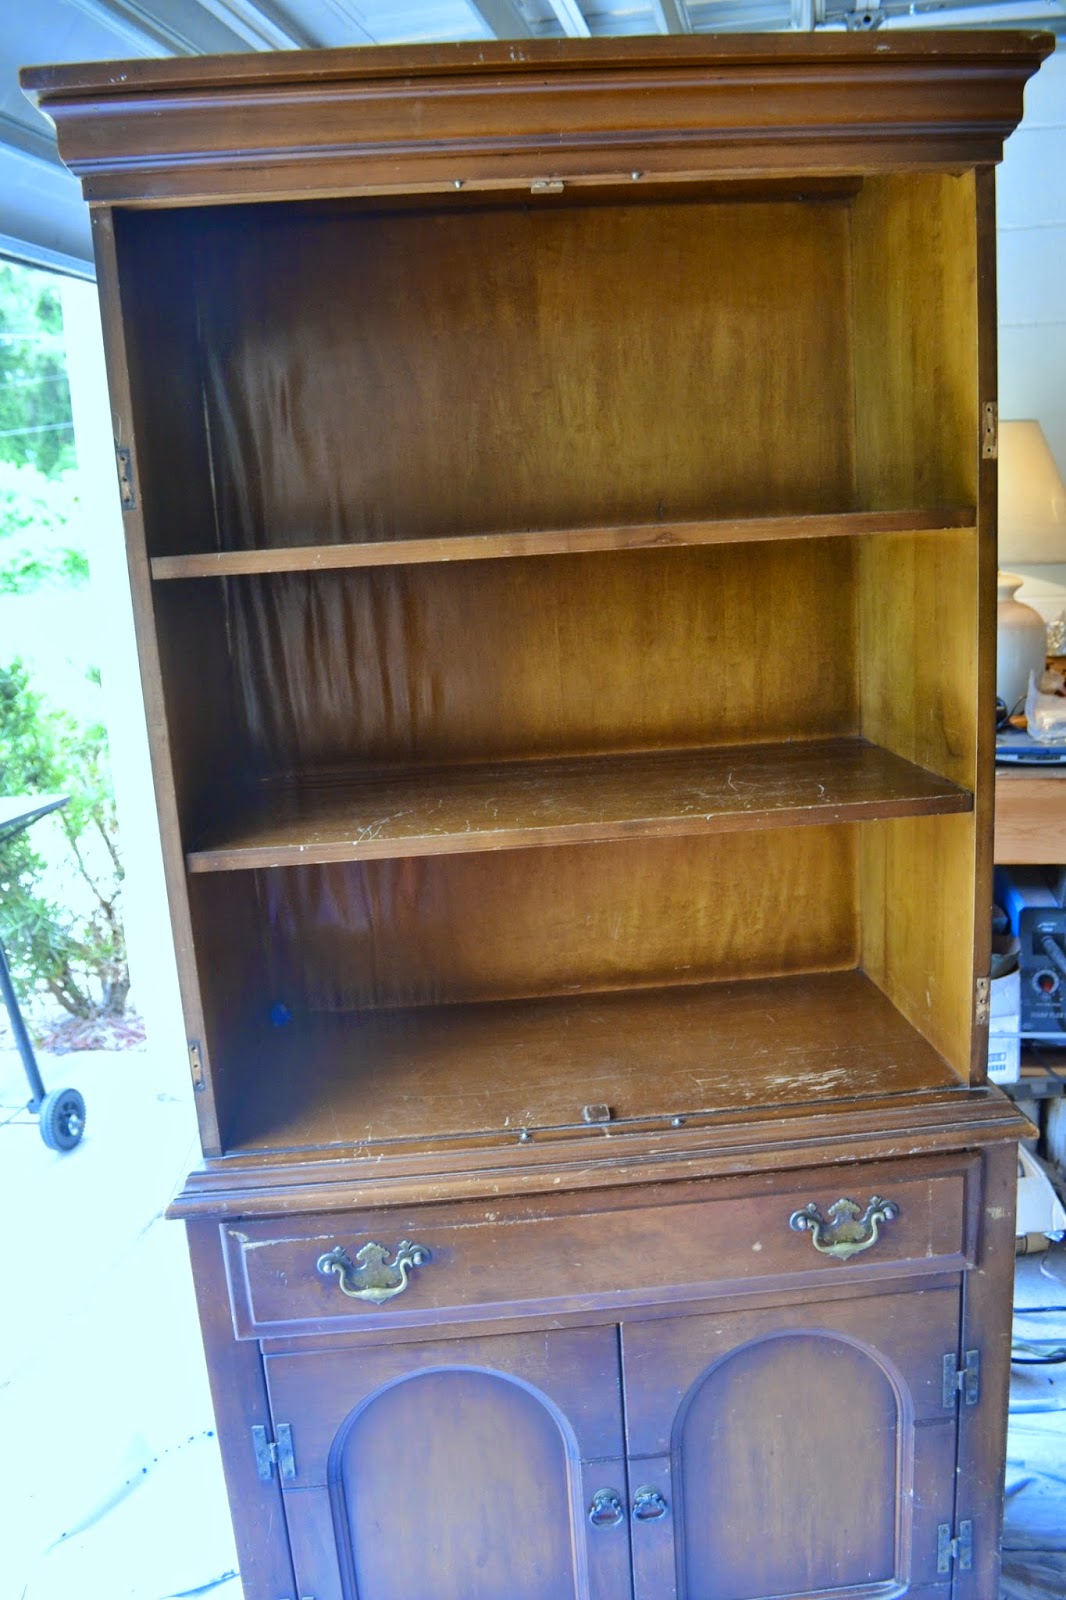
Lets start with the before, shall we?


I know what you're thinking.  No wonder this was free.  It's disgusting.  And yes, it really was.  Not only did it have your typical scratches, gashes, and knicks but it also had some type of water damage to the back board.  And I don't know if you can tell from the above pictures, but it originally had doors on it.  There were holes where the old hinges used to be, and those little push thing-a-ma-jiggys where the doors used to be.


Inside the hutch was no better than the outside.  There was some type of oil mark or goo, I'm not really sure what the heck it was and honestly, I don't like to think about the work I had to put in to try and get that off!


Okay, so it was time to get started.  First things first.  I removed all the hardware (which I kept and later used), the bottom cabinet doors, the drawer, and I removed the horrendous backing.  I also popped out those little push thing-a-ma-jiggys (someone PLEASE give me the correct word for these), and the little wooden door stoppers.  (if that is what those are even called, too!)


I don't even know how to explain what happened to this back.  To me it looks like water damage or it just rotted.  I don't even know but I was glad to haul that thing to the curb.

I, like always, filled in any scratches or holes with wood filler and let it dry for a few hours. I gave it a light sand with 150 grit sandpaper to smooth everything out.


The white mark on the side of the cabinet was actually from me!  I wanted to see how paint would stick without using a primer.  It didn't!  I had to sand off the paint.  Way to make more unnecessary work for myself! I don't know if I'll ever learn to stop trying to take short cuts.  But it was worth a try!

I gave the drawer and the cabinet doors a good sanding as well using 100 grit sandpaper.  I only did a light sand because I was using not only a primer, but a paint that was a paint in primer in one.  So I knew the coverage would be good.


Look at all the marks on the garage floor!  Black stain and no tarp is not a good match.  Whoops!


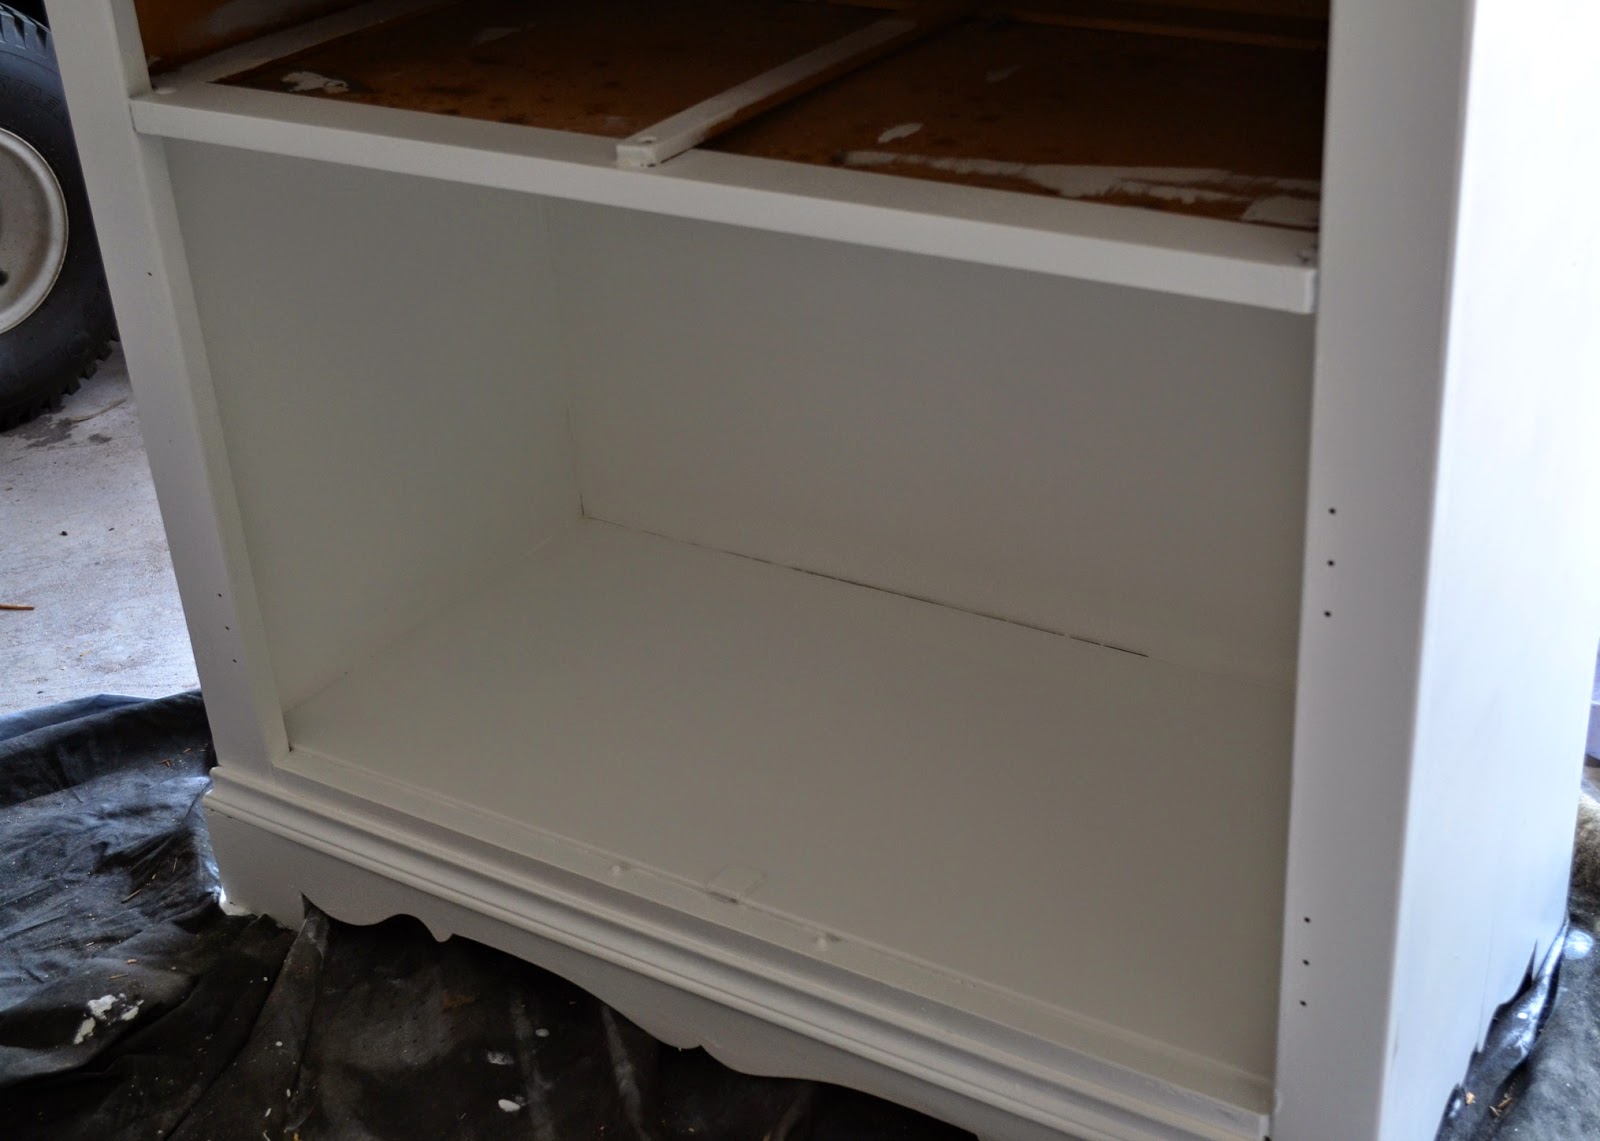
Once everything was sanded and all the wood filler was smooth, I used Zinnser Cover Stain Primer and a 4" foam roller and got to work.


Now, I've re-done enough furniture in my time to know that primer doesn't ever look good.  But for some reason, this completely freaked me out.  It looked horrible!  It was splotchy and I could see every roller mark.  And I'm not quite sure what kind of wood this piece of furniture was, but whatever it was it was soaking up primer like crazy!  The more I applied, the worse it got.  But I was determined to make this darn thing look good, so I kept going! Two more coats of primer and it looked pretty decent at this point.


I decided to also prime and paint the inside of the drawer and all the sides of the drawer.  I will eventually be lining the drawer with some velvet, but for now I just wanted a nice clean drawer.


I gave everything three coats of white paint.  My signature go to white paint is Behr's Popped Corn.  It's a perfect, bright, and clean white that I think covers almost anything. So using a 4'' foam roller and an angled brush for the edges, I got to work.


I didn't take any pictures (surprised, right?) of the final step.  I actually caulked all the edges inside the cabinet and along any trim that had a decent amount of space between the edges.

The cabinet was finally finished!  Now I needed to add the back.

For a kitchen "feel" I knew I was going to go with some type of paneling.  So off to Home Depot I went and picked up this MDF Wainscot Panel.  It ran around $19 for the entire piece.


A quick side note: I should have made my husband take his truck to pick this up.  For some odd reason I didn't realize how big the actual piece of MDF was until I brought it out to my car.  How the heck was I going to get this home?!  Normally I would have had Home Depot cut this to size, but because I'm an annoyance to myself, I forgot my measurements at home.  And I didn't want to guess.  So my husband tied this giant ol' board to the top of my car and I had to hold this thing while leaning slightly out my window.  I wanted to die.  Not only from the pain of having to hold my arm in one position for a 20 minute drive, but of complete humiliation!   So if you're going to pick up a giant piece of ANYTHING, either have a truck or bring your measurements. :)

Alright, moving on

I measured the back of the hutch and with a saw, my hubby cut the MDF to size.


When he held it up onto the hutch, I thought it looked very nice, but a little too bland for my taste.  I wanted to pick up a color so I went with an apple green that I have placed throughout my kitchen.

Yes, I actually brought this entire little "bouquet" to Home Depot. 


Got a paint sample for $2.50 and it was perfect!  The color is Japanese Fern by Behr.


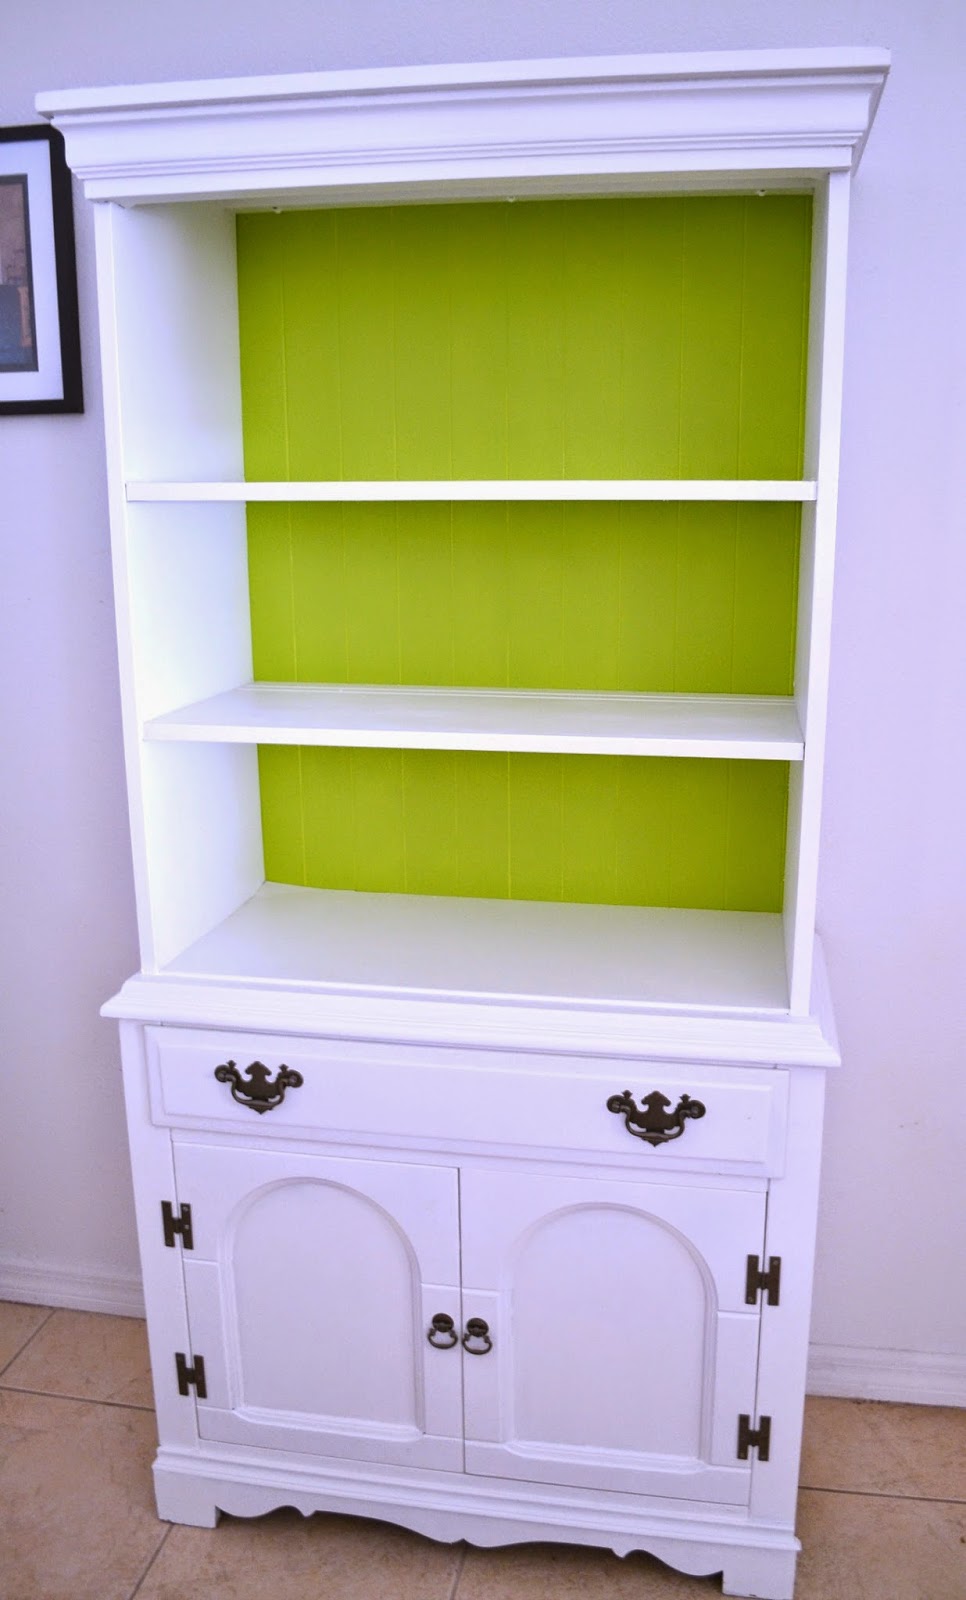
I gave the board three thin coats of paint.


(sorry about the bad phone picture, but it was dark)

I also decided to paint the inside of the cabinets, and the sides of the drawer with the green, as well.

I let all of it dry overnight. 

While it was all drying I painted the hinges and pulls.  Here they are before:


uhhh, gross!  I had a spray primer on hand so I gave everything a quick coat and let it dry for a few hours. 


Using a hammered bronze spray paint by Rust-Oleum, I gave everything two coats of paint, letting each coat of paint dry a few hours in between.


Using 1" panel board nails, my husband attached the board to the back of the hutch while I put everything back together.  It was done! *cue Hallelujah music*


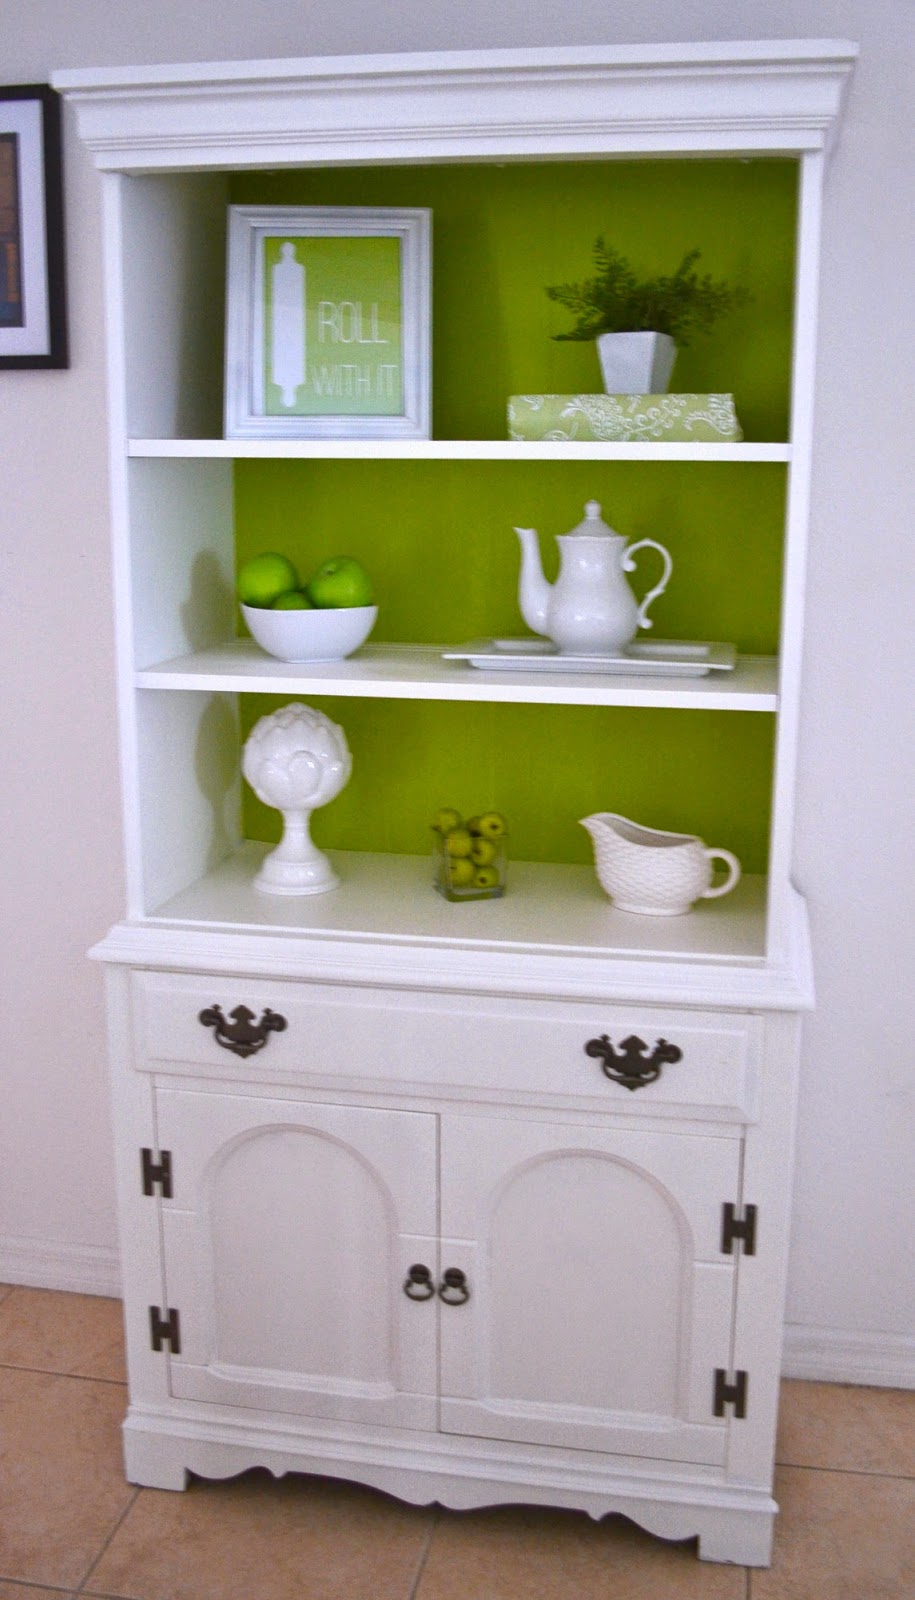
I think the green added just the right amount of "kitchen feel" and I love the pop of color every time I open the cabinets or the drawer!


And I think the dark bronze handles go so well with the light colored furniture.


If there wasn't enough pictures in this post, here's a few more of the finished piece!


If you compare these two top pictures, you can tell I'm constantly changing the decor.  Every time I go into a store I'm always looking for new green or white pieces for this little beauty!  One day I'll get it perfect! *fingers crossed*


Lets just agree right now on how amazing this artichoke is!


Here's the final before and after:


For the price of the MDF, the spray paint, and the paint sample (which are the only three things I had to buy), I got an amazing kitchen hutch for $27.  

Just because something looks really bad, you can always make it into something beautiful. 

A little work and some paint..paired with something you envision can turn anything ordinary into something great.

^^ Well, I guess that was my Dr. Seuss moment of the day.